

by Beth
Homebuilding is a hurricane of research, decision-making, scheduling, and just plain doing the work. A lot of all of this has been happening. Here are our top barndominium building updates from the end of January.
Interior Walls
The interior perimeter and main ceiling of the barn are knotty pine tongue-and-groove paneling (T&G).
It feels great to say are instead of will be. Many decisions were made between those verb tenses.
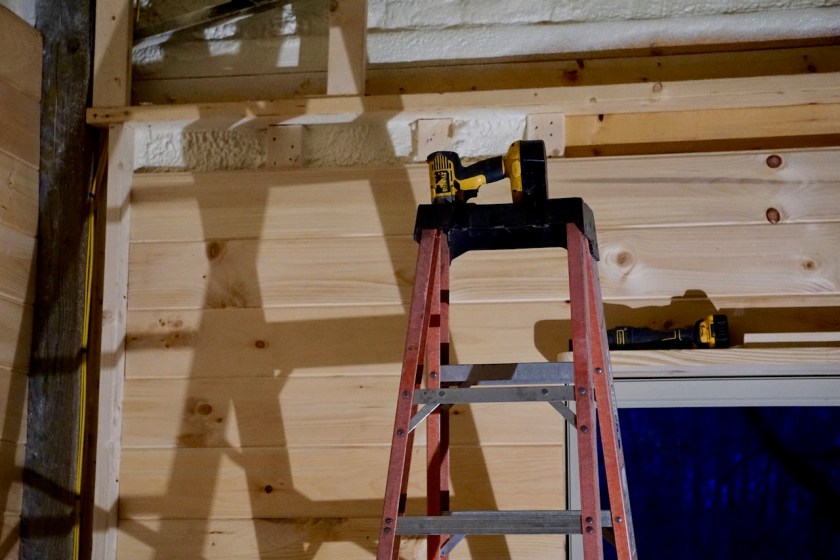 We’d been considering blue-stain T&G to set off the blue in the concrete floor, but basic knotty pine kept calling to us. Chris found a good price and a size we like, the broader 8×1″ planks, and we were full steam ahead on knotty pine.
We chose to lay the planks horizontally because Chris liked that better than the vertical paneling look. Plus, horizontal installation is easier, meaning faster and cheaper.
Oddly, the yellow in the pine brings out the gold in the floor. Somehow, the concrete is blue and gold at the same time.
 The finish was another decision. We wanted all the lightness of the pine, but unfinished wood is susceptible to schumtz and doesn’t feel as polished.
Our carpenter provided the right formula: sand the boards and roll with polyurethane. Then sand again, wipe off the dust, and add a second coat.
 We chose a satin finish. The boards drank the poly so fast that they still looked almost unfinished after the 2nd coat. Chris sanded them again, wiped off the dust, and the boards will get one more coat.
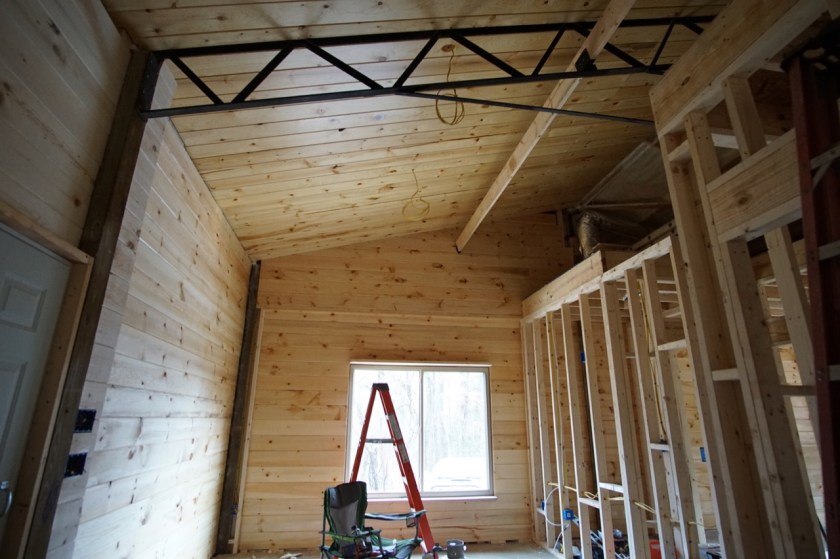
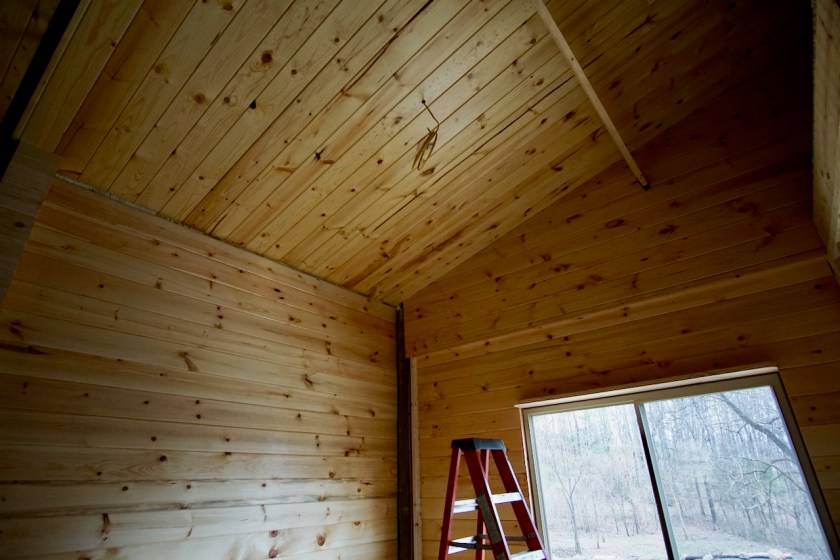 The work up front should keep the walls looking fresh for years, and poly does a good job of highlighting those piney yellows. We’re loving this look.
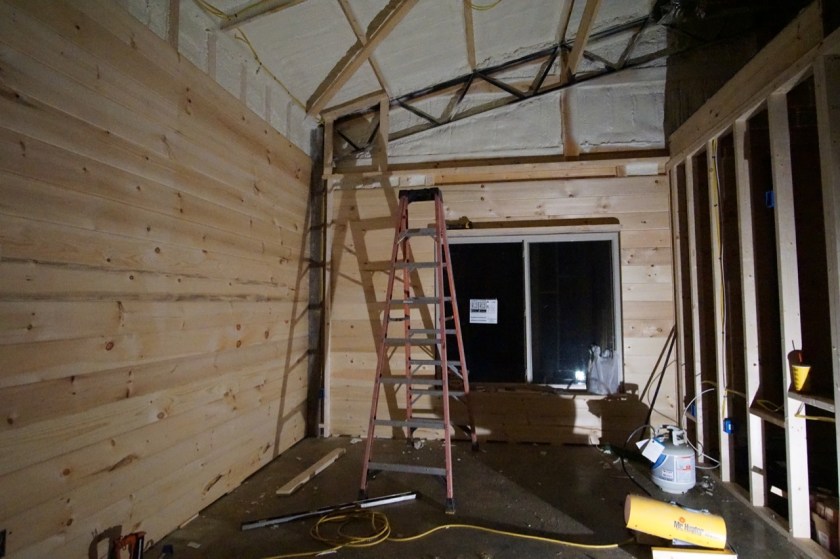
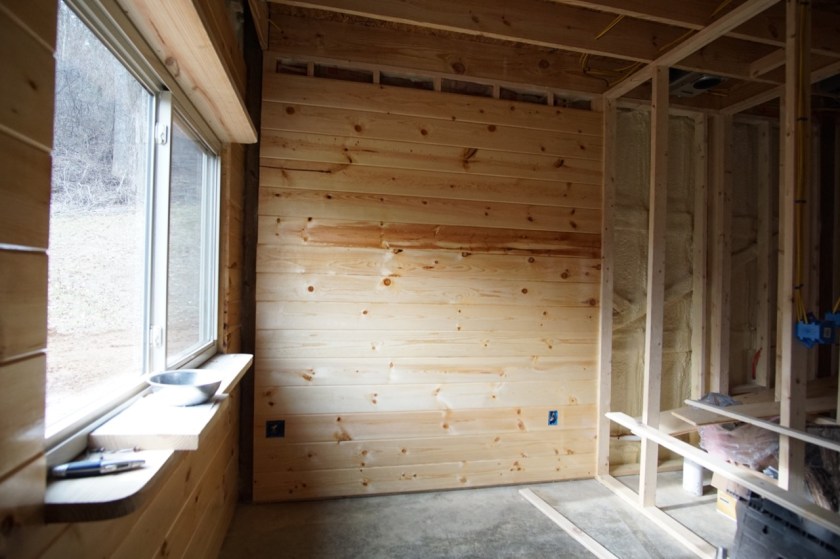 The “wet wall,” 2/3 of the back wall where most of the plumbing is, doesn’t have T&G yet but will soon. Waterlines and drain vents needed to be installed first, which brings us to…
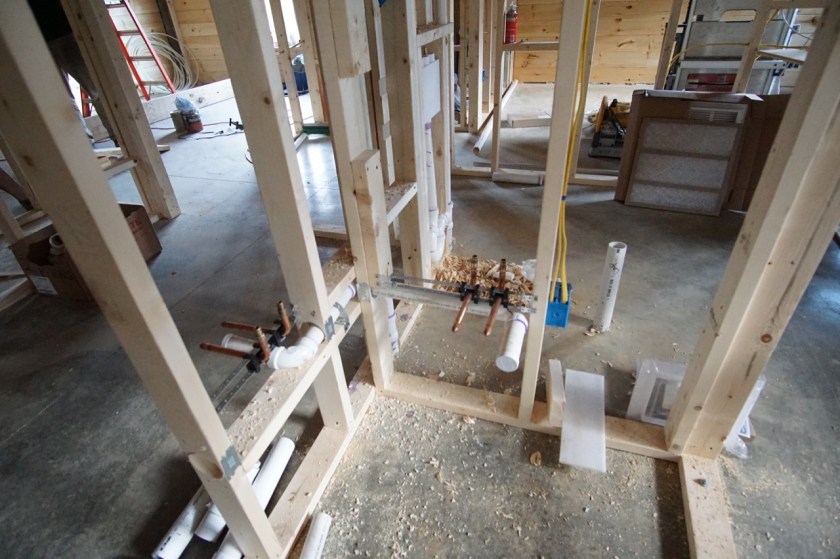
Rough Plumb #2
You may remember from our first barnbungalow update that plumbing was the first trade to kick off construction. “Trade” refers to professional tradespeople who install the mechanical workings of a house: plumbing, electrical, HVAC, communications wiring.
Plumbing happens in 3 stages. Rough #1, rough #2, and finishing. Rough #1 establishes the pipes under your floor. Rough #2 routes waterlines and drain vents, often behind the walls. This has to be done wisely in a small space. Probably in any space, really.
We’re using the same plumbing crew from rough #1 who did put a sink drain 3′ in the wrong direction. Mistakes happen. We were cool with them doing rough #2 but spent extra extra time reviewing everything together before they started.
The rogue drain was the biggest complication. To vent that sink, we were discussing an exposed pipe across the loft floor. Chris made us keep talking until we found a way to route the pipe behind a knee wall in the loft, which we’re building in front of the HVAC unit. The pipe can be as exposed as it wants because it’ll be hidden.
Chris’ mantra for the trades is to “think tiny.” Barnbungalow is 4x the size of a tiny house, but it’s still a small house, so we need be just as economical when it comes to mechanics. There’s no room for carelessness. An exposed pipe could mean wasted space or a “fort” look, the last thing we want.
In other words, if our tradespeople were writers, we’d be asking them to write a short-short, not a novel. Make something beautiful in limited space.
 The plumbers were game. They got a running start early this week. Progress slowed thanks to the first snow of the year. Not because you can’t plumb in snow but because the guys didn’t feel like driving in it.
No worries. There was plenty of other work to do. For instance, a surprise pantry reduction.
Kitchen Planning
With homebuilding, exact dimensions are golden. The earlier you have them, the smoother everything goes. Before plumbing rough #1, we’d drawn our basic kitchen layout and chosen appliances. To pin down the nitty gritty of the cabinetry, the plan was to meet with a kitchen planner at IKEA when both of us could be in Charlotte, 3 hours east of the domestead.
That was easier said than done. I had a trip planned to Charlotte in late January, so we decided I’d handle kitchen planning at IKEA on my own while Chris stayed with the barn to handle a thousand other things. We’d waited on exact dimensions too long already.
This was our kitchen last week.
I measured to the 16ths of inches (which wasn’t necessary; it turns out 8ths are enough) and drew scale mockups using Pages for Mac. Pages isn’t made for house planning, but it’s easy to use and makes nice pictures.

My mockups always have issues. That’s okay. They’re meant to convey ideas and start conversations. The biggest problems in the above drawing were willful ignorance of available cabinet sizes and the fact that I didn’t allow for 2 feet of counter on right side of the room. I expected the planner would help reel it in.
He did, and how. An interior designer with a year at IKEA but decades of kitchen experience, the planner cut no corners describing options and asking helpful questions. With his help, the kitchen transformed into…drum roll…this!
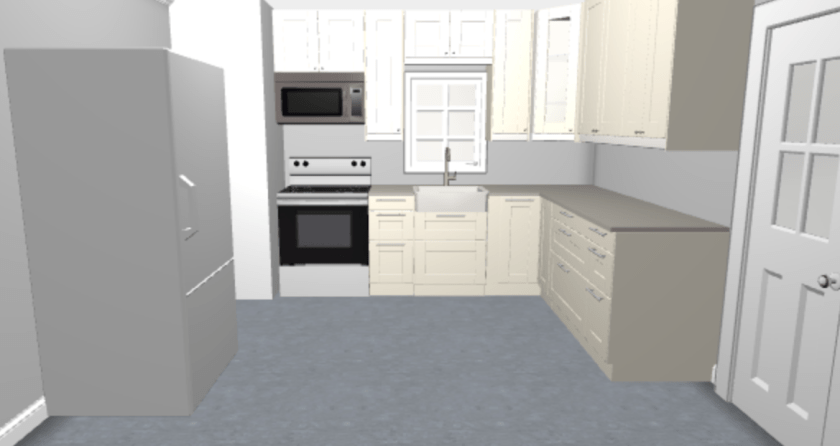 IKEA kitchen planning exceeded expectations. We worked for over 6 hours. Not sure he was supposed to share that much of his time, but I was game if he was. He doubled the size of our order, so IKEA would hopefully approve. Key differences between the photo and reality will include some rustic tweaks, a refrigerator cubby and pantry, and no grid-between-glass (GBGs, y’all!) in the window or door.
Part of the reason planning took so long was that the first 90 minutes were spent proving by exhaustion that the space I’d carefully measured wouldn’t fit a good kitchen.

We took a break, and I called Chris (again, since we’d called him at least 4 times already) full of window-related regret.
We had cut and installed the kitchen window without considering real-world cabinet dimensions. The assumption was the window should be centered on the wall, and cabinets would follow. Actually, attachments like cabinets can create as much a feeling of center and balance as the wall underneath. You can probably look around your own house to see examples of this.
The only way we were fitting more than a cluster of small cabinets  and sad patch of counter space was by not centering the sink under the window. I already knew Chris wouldn’t go for an off-center sink.
Among the reasons I’m lucky to have Chris as a building and life partner are that he sticks to his values (in this case, symmetry) and he’s an expert problem solver. And he has a wicked sense of humor, which isn’t germane here but makes life better in general. Before I fell down the window-anguish rabbit hole, he piped in, “Let’s shrink the pantry.”
I’d been resisting that. Barnbungalow has 2 closets. Shrinking any storage area seemed like a bad scene. Now, my resistance was offset by the fact that our kitchen couldn’t even fit a junk drawer. We’d need extra furniture to stow necessities. We were coming in way under budget, but savings aren’t worth the unhappiness of a bad kitchen.
In the next 15 minutes, with a break for Chris to confer with our carpenter, we decided to reduce the pantry by 10″ one direction and 34″ in another, and flip the fridge from the right side to the left. This made room for a relative abundance of drawers and counter space. And a little pantry. Marie Kondo, here we come.
Before you think we’re too bananas, we also have a storage loft. It’s where we store Chris when he’s solving problems.

Anyway, the pantry didn’t have wall covering yet, but it was solidly, beautifully framed, so changing the size was time-consuming. Any amount of un-building is a bummer.
Lesson learned: plan as many exact dimensions in your home as early as possible. Here’s what the kitchen area looked like earlier this week, with pantry reduction complete.
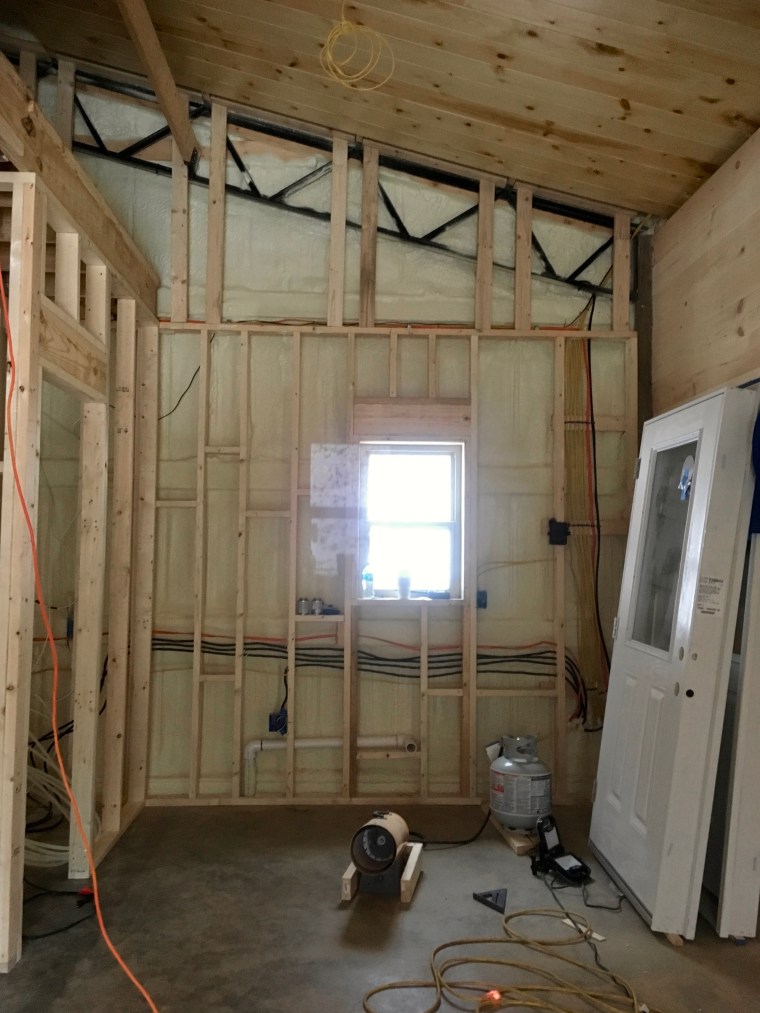
It’s ready for the drawing to come to life. Especially after the plumbers returned from their  snow days to finish the waterlines. Of course, now we have to sand, install, poly, sand, poly, sand, and poly the T&G on this wall first, and we have to pick up the kitchen from IKEA.
I’d been vaguely hoping to cram pieces of kitchen into my SUV last weekend after the planning appointment, but it turned out to be 132 boxes. Countertops not included, as IKEA wouldn’t sell us the quartz counter we wanted without delivering and installing it, and we’re out of delivery range. One of my besties had advised we could get better prices sourcing the countertop elsewhere anyway, so no biggie. IKEA did have the perfect quartz to match the concrete floor, though.
Instead, I made my way through the bathroom section, with purpose, for the 3rd time, to hopefully make final decisions. When we go back to pick up the kitchen, we can grab bathroom furniture, too.

It’s amazing how many ways they let you make furniture your own, yet no vanities are yelling “pick me,” at IKEA or anywhere else. IKEA does have a sink-trap configuration that’s attractive for tight spaces. Their traps sit parallel to the wall instead of perpendicular, so you can have a larger drawer directly under the sink. Combine that with affordability and ease of assembly, and IKEA is probably the way we’ll go for bathroom furniture.
Drywall
Our local big box store wasn’t as put off by snowmageddon as the plumbers. They were happy to brave the flurries to deliver drywall, and now it’s going up. Here’s the new refrigerator cubby.

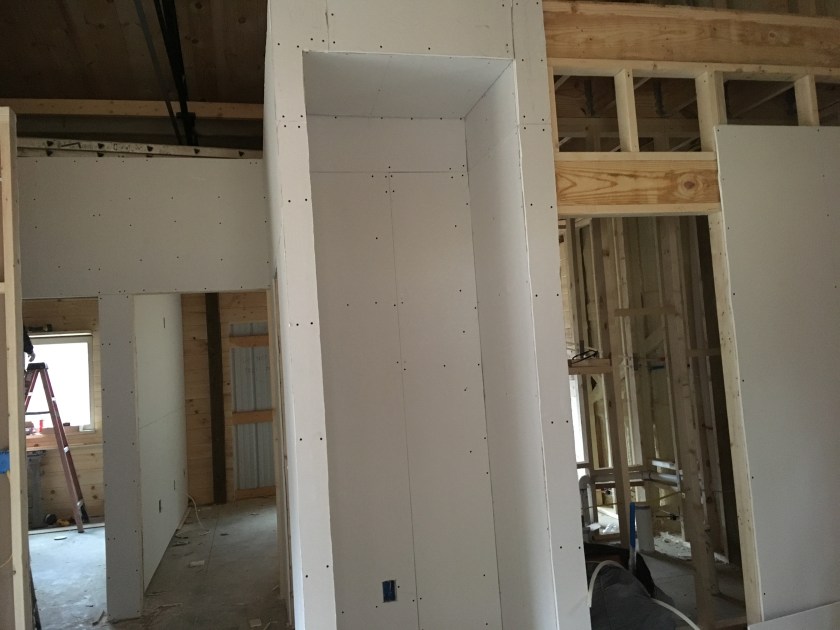
And the big study wall.
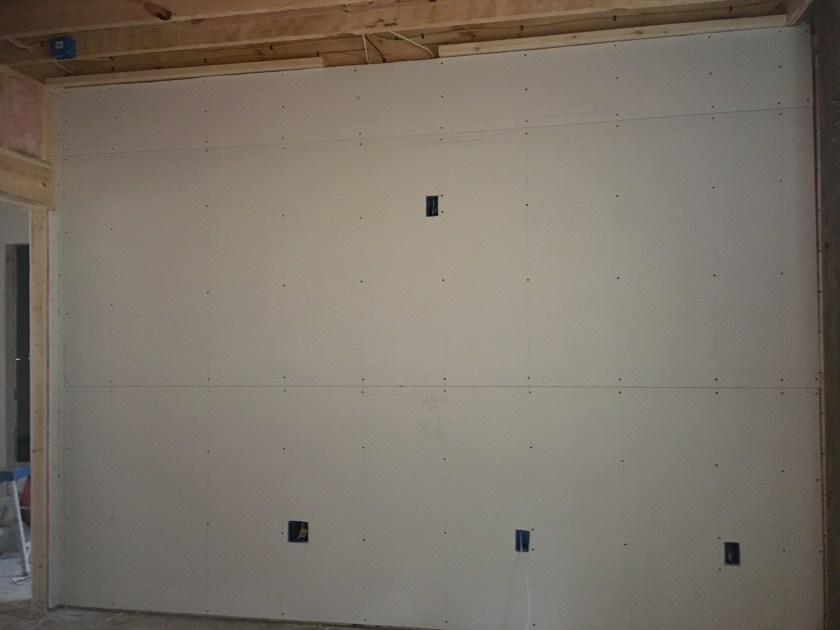
Bring on the drywall dust.

The weather is boomeranging from the teens to the 60s this weekend. Bad for maple-syrup season, which is best with nights under freezing and days over 40, but fantastic for building. A mild winter means more days to work with materials that don’t like freezing weather, like polyurethane and drywall spackle (“mud”).
So now you know what we’ll be doing until our next update. Thanks for reading!
