
by Beth
Did you know you can tap trees to make maple syrup in the South? This lost tradition was such a big part of life in Appalachia that part of the Great Smoky Mountains National Park is called the “Sugarlands.” People have had success tapping trees as far down as Georgia and Alabama.
Sugaring is easy and rewarding. Basically, you…
- Tap trees at the right time.
- Collect jugs of sap daily.
- Boil sap down into syrup.
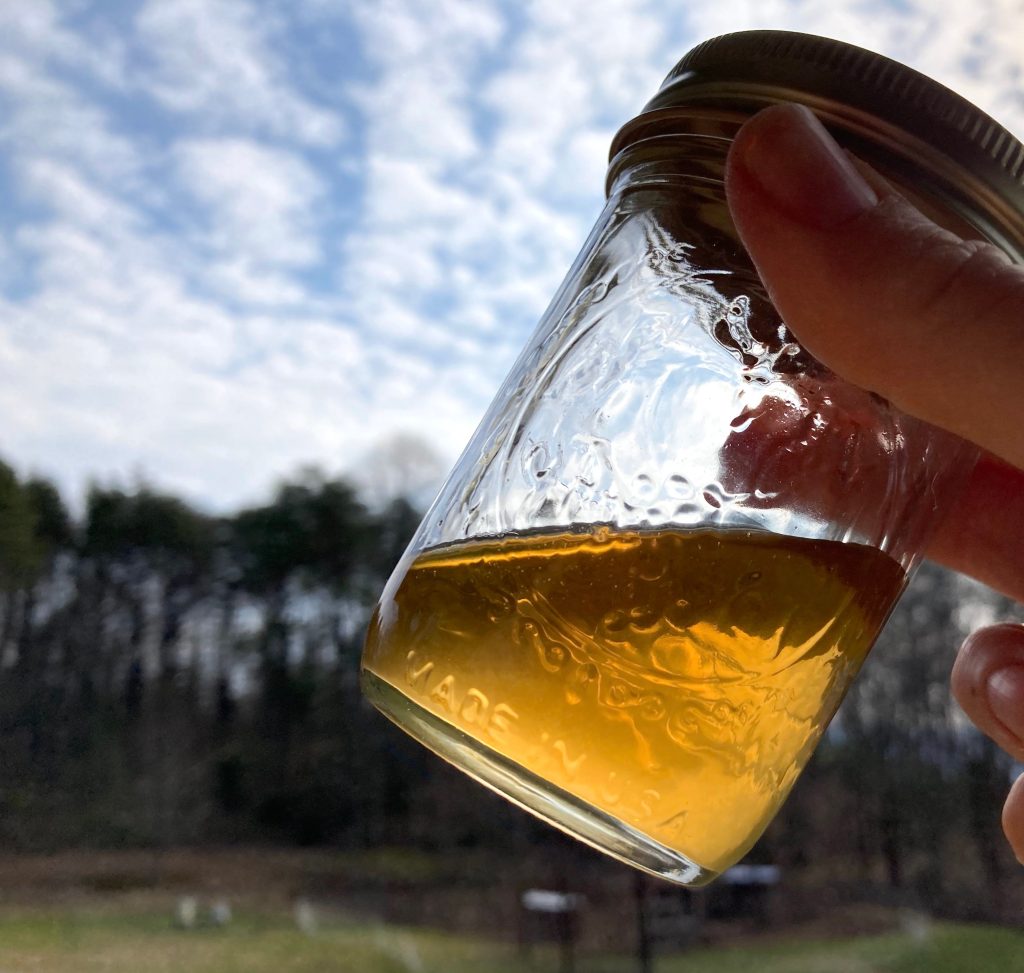
Sap is clear, like water, and slightly sweet. You can drink and cook with it. For syrup, you boil most of the moisture out of sap in a process called “sugaring.”
We first tried sugaring in 2018 after seeing a post on the Instagram of a Western North Carolina botanist. There’s so much happening around the domestead that we’ve always taken a casual approach to sugaring, tapping 5-10 trees and ending up with a few quarter pints of syrup per year. The flip side is we spend very little to enjoy this sweet hobby.
Over 4 sugaring seasons, we’ve compiled the following guide to easy maple syrup in the Southern Appalachians.
Easy Sugaring Supply List, with Tips
At our scale, annual costs are < $20. In fact, some years we have enough supplies saved to spend $0. Here’s what we toss into the golf cart at tapping time:
- Plastic taps and tubing – A starter pack of 10 taps with food-grade tubing is about $25 on Amazon. Most are 5/16″, the currently preferred size because the tap holes heal faster than the old 7/16″ holes.
- Drill and 5/16 drill bit – Even if you have a 5/16″ bit on hand, buy a new one for trees so it’s clean and sharp. Dull bits can heat up and cauterize sap wood as you drill. Dirty bits add contaminates that encourage the tree to close up the tap hole too fast.
- 1/2 gallon or gallon jugs or jars – Gallon water jugs are the easiest to carry around in the woods and attach to tubing. Avoid jugs that held milk or other flavored items because there’s no way to fully sterilize them, and sap picks up flavors easily. For the plastic averse, 1/2 gallon mason jars work beautifully. Be sure to carefully cover the top of the jar to keep out bugs and debris. You can make a makeshift cover from duct tape or drill a hole into a cover to thread the tubing into.
- Duct tape – Use this to affix tubing to collection jugs and to cover spots where bugs or debris can fall in. You can also wrap a piece of tape around your drill bit at 1.5 or 2″ to mark how deep to drill into a tree.
- Rubber mallet – To gently drive taps into trees.
- Vodka – It’s a good practice to disinfect anything that goes into the tree. I soak the drill bit and new taps in a container of vodka.
Here’s a candid shot of our operation. Golf cart and a dog in a hoodie are optional.

After enough sap is collected, it’s time to boil! Here’s what you need for that:
- Hot plate – Boil outside! Sap vapor makes everything sticky. Bigger operations have sugar shacks for their large-scale evaporation setups. To produce on a small scale, a $35 hot plate in a covered outdoor area is perfect.
- Big pot – To boil the sap on the heating plate. We avoid nonstick since the coating is questionable and tends to hold onto secret flavors that may leach into the syrup.
- Fine strainer – To catch bugs and bits of tree barks in the sap as you pour it into the pot.
- Food thermometer – A digital grilling thermometer with a wired probe works fine. Near the end of the boiling process, when sap starts looking golden, drop the probe into the pot and set the alarm for 215°F so you can watch carefully as it reaches 219°. If syrup overheats, it’ll crystalize in a few weeks. And of course, if it really overheats, it’ll burn, which is tragic.
- Coffee filters and a funnel – When you’re done boiling, put a filter in a funnel and the funnel on top of your final jar. Then pour the sap in and let the coffee filter take out any impurities that would make the sap cloudy, gritty, or prone to crystallizing.
- 1/2 pint jars – To store the finished product.

Other Notes
- Don’t go too cheap on the hot plate, or boiling will take forever. We used to use a $10 hot plate. On a cold day, boiling any more than 2 gallons of sap at a time could take 12+ hours! A small upgrade to this one cut that time in half (we don’t get any money from that link, btw). It’s 1,500 watt, not glass (so it can hold heavy pots of liquid without cracking), and is more of a platform than a simple coil so it spreads heat more evenly across the surface.
- We buy a new 5/16″ drill bit every few years to make sure it’s sharp and might buy one annually if we drilled more than 5-10 trees a year.
- The items we replace annually are water jugs and taps.
- It’s a best practice to use brand-new taps because sterile equipment encourages sap flow, while contaminates encourage tap holes to seal up. Some say there’s no sure way to sterilize taps, even metal ones. We do re-use the tubing. I run boiling water and, later, vodka through each tube after pulling taps and again right before tapping the next season.
- To switch out taps in tubing, soak in nearly boiling water for 30 seconds to soften the tubing.
There are many fancier options for taps, collection systems, and evaporation setups. You can spend $16 instead of $6 on a drill bit that is supposed to pull more wood chips out of tap holes (the low-tech route is to flick the pulp out of the hole with a twig). You can track sap and syrup sugar content with a refractometer. The added efficiency of upgraded equipment is worth it when boiling high volumes of sap, but if you’re keeping it small, know that exquisite syrup can be produced with a low-tech setup.
Tapping: Timing Is Everything
No amount of spending can make sap flow if you tap at the wrong time. Too soon, and the holes can dry out before the flow begins. Too late, and you’ll miss the flow or end up with bitter syrup.
The internet says the ideal time to tap trees is before a string of consecutive nights in the 20s with days over 40°F. In east Tennessee at 1,600′, if we’re lucky, this happens sometimes for 2-3 weeks between January and February. However, our temperatures are more likely to be very cold for a couple days, then warmer for a couple days. We rarely see a string of days that seesaw from 25 to 45 to 25 to 45 in any kind of rhythm.
Also, possibly because our trees are quite shaded, they seem to flow best during days over 50 and will keep flowing overnight if temperatures don’t drop much below 35. But if we don’t dip into the 20s within 72 hours, the flow stops again.

The right temperatures don’t guarantee sap flow. Mysteriously, we’ll find some trees running while others are totally dry. Factors I want to someday understand include the affect of rainfall and whether shade or a warm December will make sap run later. This article pecks away at the complexities of sap movement, if you’d like to explore more how it works to inform your own tap timing.
By Valentine’s Day, even if sap is still dripping, we remove taps because the maples are starting to flower. If you’ve tasted lettuce off a bolted plant, you know why you don’t take sap from flowering trees flower: it’s bitter.
Sap is mostly water, so it takes a lot of sap to make syrup. The standard ratio is 40 gallons of sap to 1 gallon of syrup. If you only end up with a gallon or 2 of sap from your efforts, you might consider drinking this “tree water” instead of going to the trouble of boiling it. Tree sap is an amazing living food. If all your collection equipment is sterile and the sap is fresh, sap is a healthy, precious treat.
Choosing Trees
The gold standard for sugary sap is the sugar maple. Their sap is supposed to have the highest percentage of sugar, meaning more syrup from less sap. However other maples – and 3 other trees common to our area, including black walnut, birch, and sycamore – provide great sap for syrup. All of these trees have telltale bark, which is nice if you forget to identify tapping trees before they drop their leaves in winter.
Our acreage has precisely zero sugar maples that will be large enough to tap in our lifetime. It takes about 40 years for a tree to grow to tapping size. However, we have dozens of big red maples, and their sap is surprisingly sweet.
Most websites we’ve referred to tap trees over 10″ in diameter (divide the circumference by 3.14, so the circumference should be 32″) at 4′ up the trunk. We usually err on the side of caution, tapping trees with a 38″ circumference at 4.5′ up the trunk.

Tapping
Drill 1.5-2″ into the tree at a slightly upwards angle to help the sap flow out. You want to drill 1″ past the bark layer. On a medium tree, that’s usually 1.5″ total, but it varies.
We drill anywhere 3-5′ up the trunk, depending how long our tubing is and whether we’ve tapped the tree before. If you’ve tapped a tree in previous years, the guidance is to drill about 6″ from old holes and 18″ above or below.
It’s recommended to drill on the south or sunny side of a tree because warmth encourages sap flow. If a tree is shaded, it may be best to observe for a couple days to see where the most sun hits it. You might also check if birds have noticed which side is best for sap in a segment of your forest…birds are much better than us at finding sap! Here’s a line of beak-drilled sap holes.

If a bird has already tapped a tree for you, you can still tap it, but you may not get as much sap and may tax the tree. Often, birds tap our best trees after we’ve tapped them. If a tree is running okay, we go ahead and leave our tap in, but we might give those trees a break from tapping next year so they get to keep more of their own sap.
Drill gently! You don’t want the hole to heat up. Let your clean, sharp drill bit tease out as many wood bits from the hole as possible without over drilling. Sap will leak a little around the sides of your tap if you accidentally make the hole too big around, but that’s okay. Pick the rest of the wood bits out of the hole with a twig. I’ve seen advice that you’re not supposed to blow in the hole because your germs kickstart the tree’s self-healing measures to close up the hole.
Next, tap in the tap, not hammering too hard, which could split the tree. We like a 16″ rubber mallet for the job. The tap doesn’t have to go all the way in. In fact, driving the tap too deep can make life hard when it’s time to retrieve the taps at the end of the season.
This PDF discusses tapping recommendations based on a tree’s size. We’ve broken some of these rules accidentally in the past. For example, here’s a new and old sap hole way too close to each other. Somehow, the old hole still isn’t fully healed. This is hard on the tree and can reduce the amount of sap harvested.

Sap will hopefully begin dripping out right after you tap. If not, this doesn’t mean the tree won’t eventually begin running. There’s an air of mystery around what makes sap run.
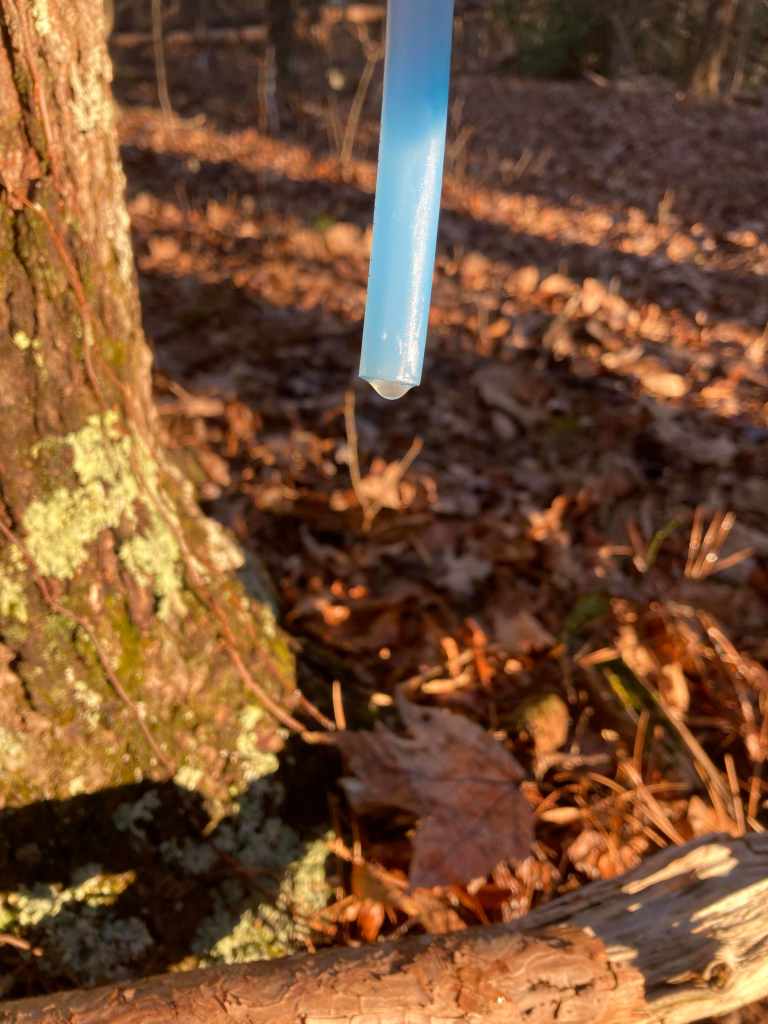
Squish the taps into the tubing before leaving the house, so each tap already has a hose attached when you head off into the woods. It takes about 30 seconds in nearly boiling water to soften the tubing enough to push a tap in, easier to do in the house than the forest.

After tapping, with tap and tube now hanging off the tree, all I have to do is attach a clean collection container, cover the opening to prevent bugs from falling in, and find a way to prop it up so it doesn’t blow over. My favorites are 1/2-gallon jars and plastic water jugs. Don’t use milk jugs or other food containers; sap is great at picking up flavors.

Collect Daily
Sap is perishable. Even if it’s not running much, it’s important to gather sap 1-2 times a day and either boil it right away or store it in the fridge. It’s fine to freeze sap if you’re working large quantities and won’t have time to boil it within a few days.
Trees Not Running?
Ugh, it’s frustrating. Trees seem whimsical about when they choose to run. It may help to take notes about weather conditions and trees that produce successful flows each year.
Again, if a tree is dry when you tap, it’s your call whether to leave the tap for a few days to see if it starts. It may be a late runner, especially if it’s on a northern slope or in a shady area, or the tree may not plan to run sap at all this year. You won’t know until you know.
One year, some local friends did so well tapping in early January that I decided to tap a few weeks earlier than usual. When none of our trees produced after a couple weeks, I pulled the taps…and found wet trunks below my empty tap holes a week later. One difference was that our friends’ trees were in town, in a sunny yard. We share a ZIP Code, but our trees are in different conditions – on a mountain, in the woods – so our sap runs later. And there could be still other factors we didn’t account for.
Even among our trees, some produce gallons of sap while adjacent trees won’t give up a drop. Very mysterious.
Annnnd Boil
I’ll admit that when it comes to boiling sap, I’m imprecise. I plunk a clean pot on a cheap hot plate on the front porch, pour in as much fresh sap as we have, or as much as the pot will hold, and boil away.

I don’t test sugar content, going by temperature and sight instead. Sugar content should be good when the sap hits 219°.
If we don’t have enough sap by the end of the boil for the thermometer to be properly submerged, I’ll either switch to a smaller pot or just eyeball it for consistency and color. As long as we aren’t selling syrup, we’re beholden only to our taste buds, not to official syrup specifications around sugar content, etc.
As casual as I am, there are rules I don’t bend, to ensure safety and quality:
- Set aside ample time to boil when people are around. Don’t leave a heat source unattended!
- Use very clean equipment, from the pot to the strainer to the jars for storing the final product.
- Only use fresh sap that has been kept cold, no more than a few days old (unless you freeze it). Sap should be clear, never cloudy.
- Pour the sap through a fine strainer before boiling to remove impurities. You don’t want syrup to taste like boiled ant.

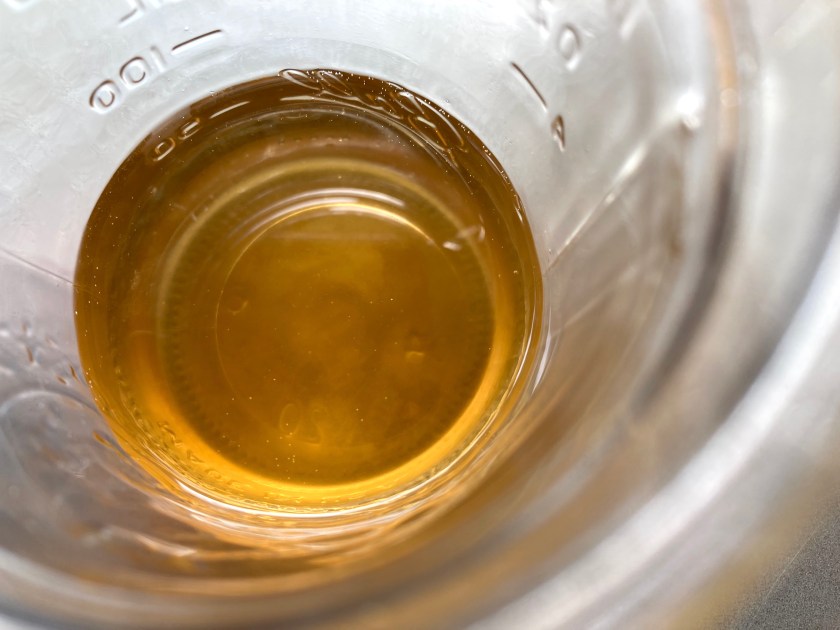
Sap may gather foam on top as it boils. You can skim that off with a spoon or strainer every few hours.

As water boils off, the sap will slowly turn golden. Near the end of the boil as it starts to become more viscous, I drop the sterilized food-thermometer probe into the pot and set the alarm for 215°F, then watch as the syrup reaches the goal temperature of 219°. If syrup heats too much, even by a minute, it can burn, which is a tragedy after all the work you put in.
The end result is exquisite and, as always when you create your own food, rewarding in a way that’s hard to put into words. If you’re in a location with the right conditions for sap to flow, we highly recommend giving sugaring a try!

This is fascinating to read. Well done!
LikeLike
That was amazing and very interesting information! Yum!
LikeLike
Yuuummmmm!
LikeLike